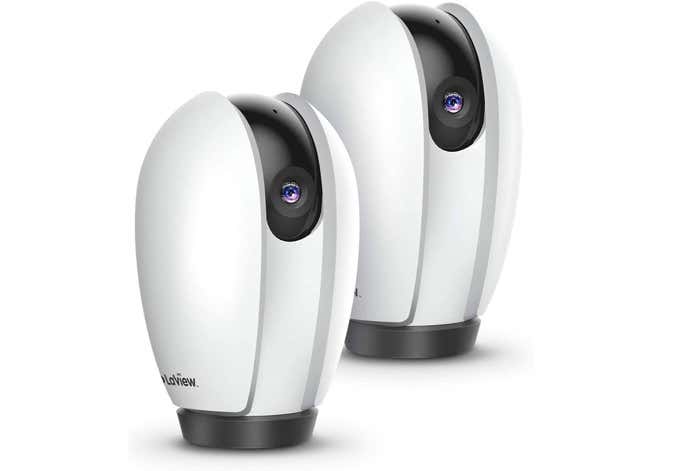
The market for wireless security camera solutions is booming, since most people prefer the ability to simply mount a camera, connect it to their home wireless network, and start monitoring inside and outside their home. In this review, we’re going to look at two such indoor and outdoor LaView security cameras: The R3 PT indoor wireless security camera, and the R12 1080P outdoor wireless security camera.
Mounting the R3 PT Indoor Wireless Security Camera
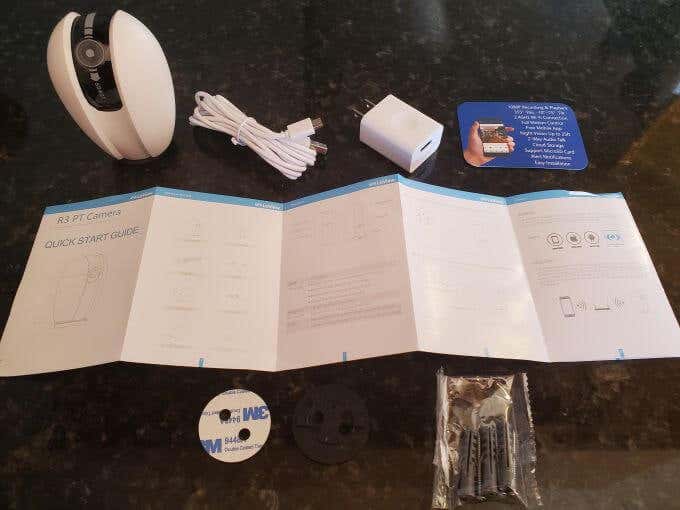
The R3 PT indoor security camera comes in a simple plastic package that includes all the parts you’ll need to mount and set up the camera. The box includes:
The HD 1080P security camera with a 355-degree pan-tilt feature that you can remotely control from your smartphone.A 6-foot USB power cable with the standard 120V to USB adapter.Quick start guide and a quick reference card of all features.Mounting screws and drywall anchors.A 3M two-sided adhesive pad for mounting on flat surfaces.
Here are the features you can expect when you purchase the R3 PT indoor security camera:
High-resolution, 1080P video recording and playback (to your phone).Remote control 355-degree pan with a -10 to 75-degree tilt.IR night vision up to 25-feet (enough to cover most rooms)Audio conversations with anyone in the room using the mobile app.MicroSD card support for local video or photo storage (not included).Push notifications to your phone any time movement or sound is detected.
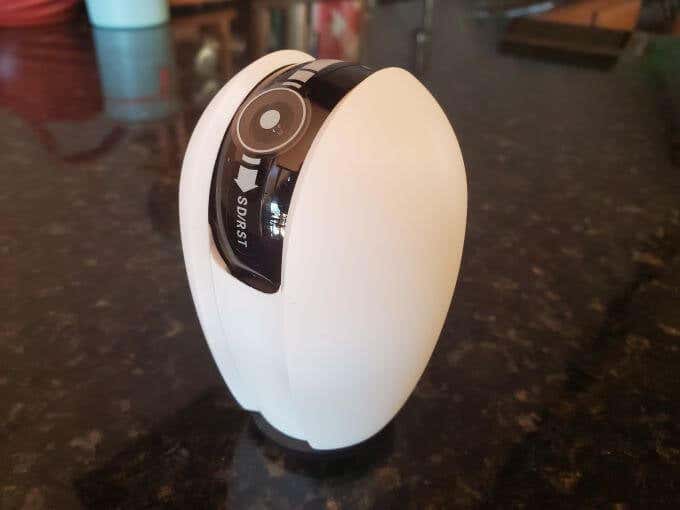
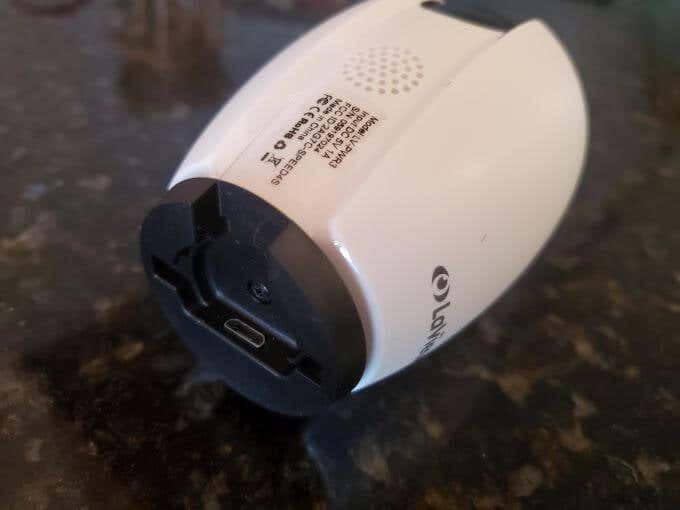
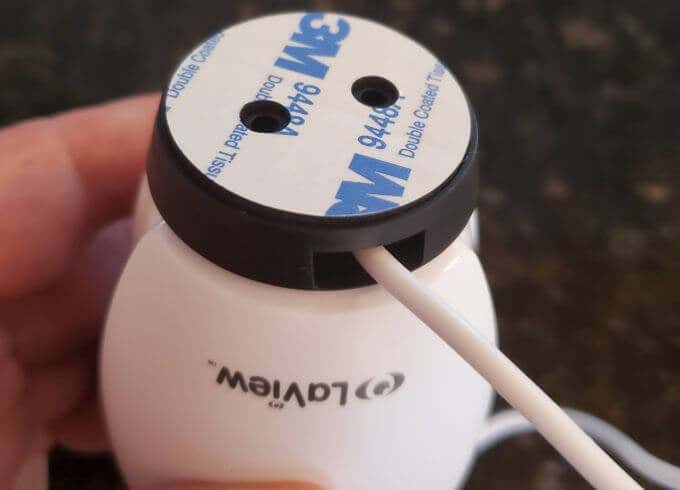
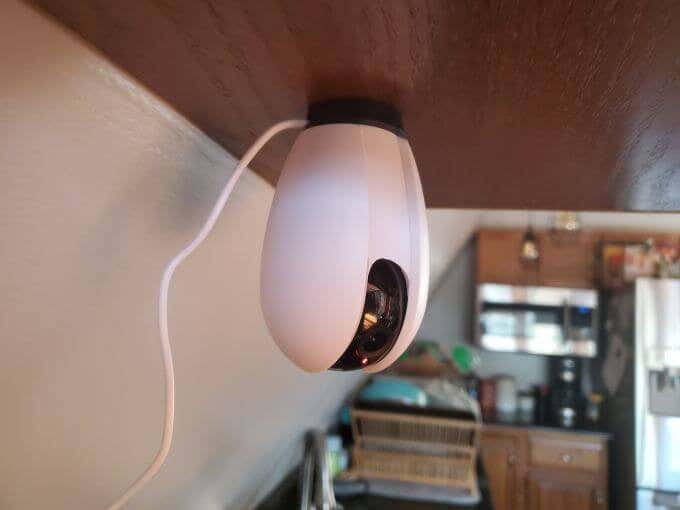
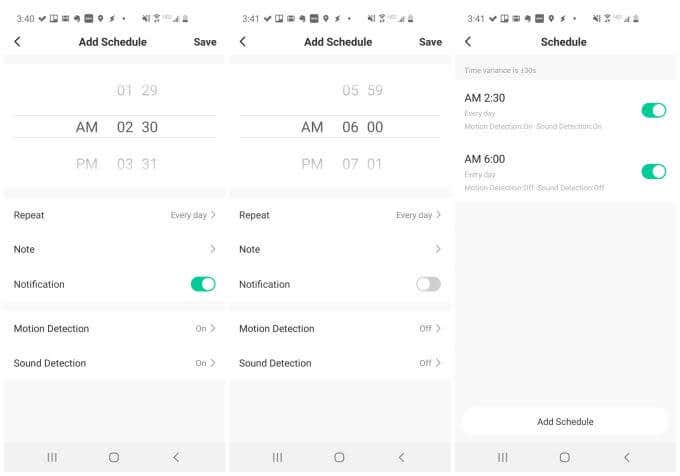
Push notifications are optional. You can disable motion or sound detection or schedule it to be activated only at certain times of the day or night. Taking a closer look at the camera unit itself, you’ll see that the 1080P camera itself is mounted on a black rotating wheel, with the microphone separated from it on the same wheel, about 30 degrees apart. If you flip the camera over, you’ll see the micro-USB placed inside an indent, which lets you slide the USB power cable underneath the mounting plate. The mounting plate itself just requires a quick turn (no screws) to attach it to the bottom of the camera. If you’re planning to mount the camera using the screws, you should wait to attach it to the camera. If you want to use the adhesive pad instead, then attach the mounting plate, remove one side of the adhesive pad, and attach it to the mounting plate as shown here. Ideally, if you’re going to mount the camera upside down you should stick to using screws for a more secure mount. However, in our testing we found that the 3M adhesive pad was strong enough to keep the lightweight camera in place, even upside down. However, you should be aware it could eventually drop if you don’t use screws in this position. The camera can be mounted upside down as shown below, or on a tabletop surface, such as the top of a dresser in a baby room, or anywhere else that’s out of the way but with a good vantage point of the room you want to monitor. You should also purchase some wall cable clips to keep the cable against the wall down to the point where it’s plugged into the outlet. This will provide a cleaner mount. Or, if mounted on a child’s dresser or some other surface near a wall, you can just drape the cable behind the furniture as well. If you’ve only purchased the R3 PT and want to see how to configure it using the LaView app, you can skip the next section.
Mounting the R12 Outdoor Wireless Security Camera
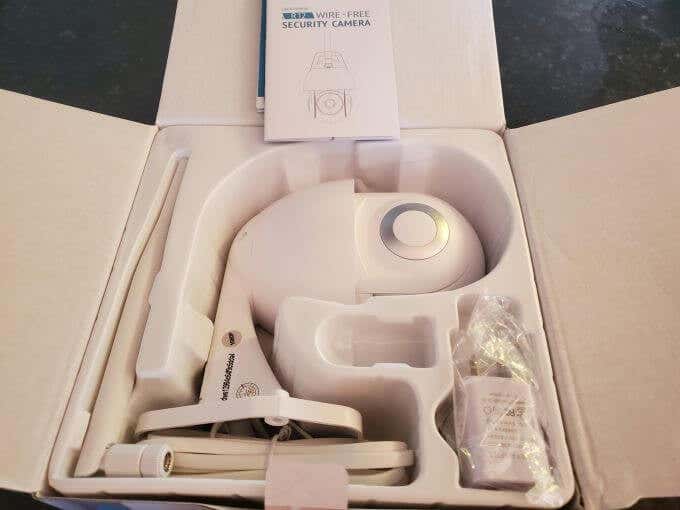
Since software setup for both cameras is identical, we’ll cover unboxing and mounting the R12 outdoor wireless security camera first. You’ll receive the R12 outdoor security camera in a box that includes all the parts you’ll need to mount and power it up. The box includes:
The HD 1080P security camera with a 360-degree horizontal tilt and 110-degree vertical tilt, which you can remotely control from your smartphone.A 10-foot USB power cable with the standard 120V to USB adapter.A User Manual and Quick start guide.Mounting screws and drywall anchors.
Here are the features you can expect when you purchase the R3 PT indoor security camera:
High-resolution, 1080P video recording and playback (to your phone).Remote control 360-degree horizontal pan with a 110-degree vertical tilt.IR night vision capability.Hold audio conversations with anyone nearby.MicroSD card support for local video or photo storage (not included).Push notifications to your phone any time movement or sound is detected.Compatible with both Alexa and Google Home
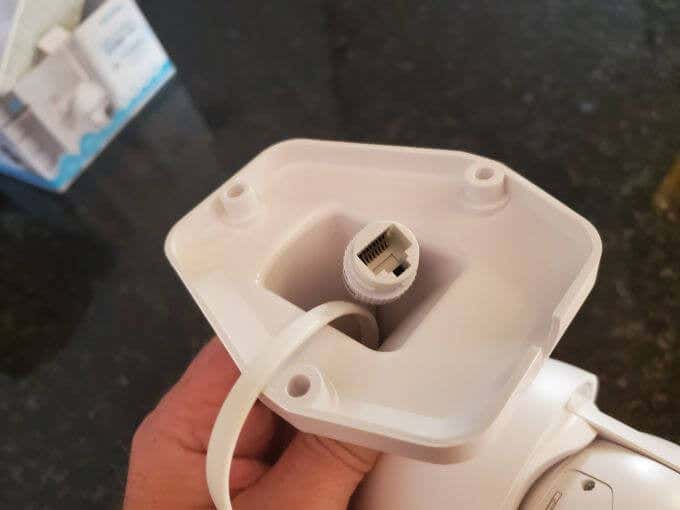
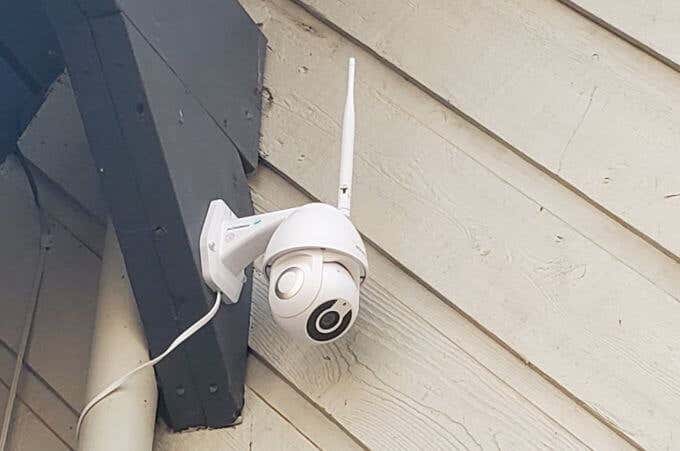
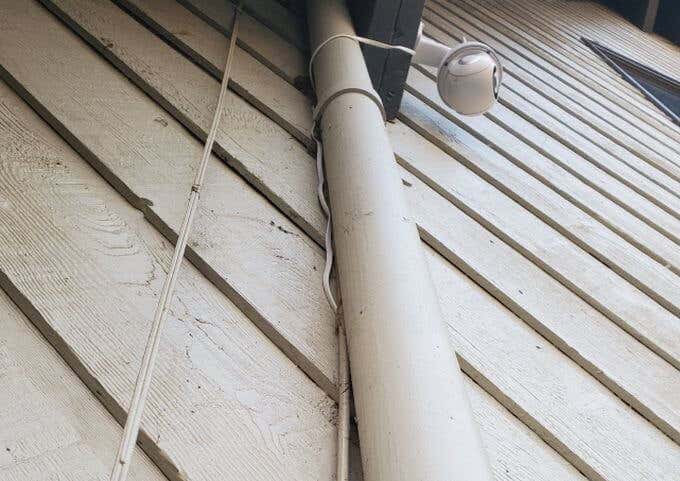
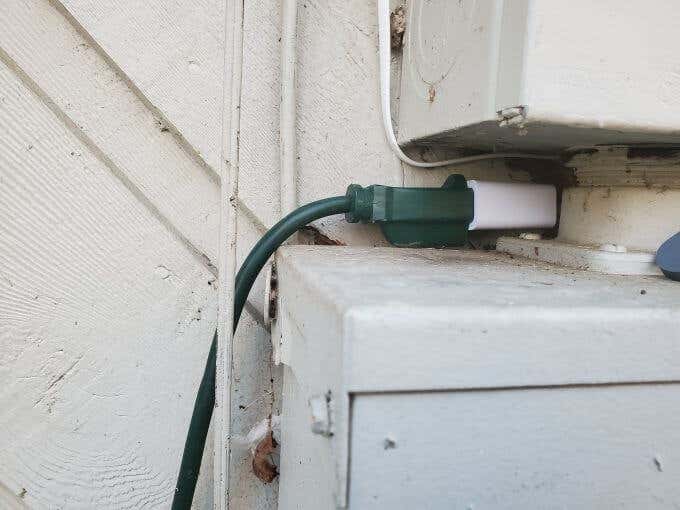
Mounting the camera is extremely easy, but before you start you should know the unit includes a network port if you’re looking for a more secure wired solution. This is ideal in those situations where you can’t get a good WiFi signal outdoors where you want to mount the camera. Mounting the camera requires nothing more than a screwdriver (or power drill if the wood you’re screwing into is very hard). Just screw the WiFi antenna onto the gold colored port on the back of the camera unit. Then position the base on the surface where you want to mount the camera. Insert and tighten the three screws into the wood to hold the base in place. Installation is really that simple. The only step that might require a little work is running a power cable to a nearby outdoor outlet. Ideally, you should use any structures on your external wall to attach the power cable (using ties or wall wire-tacks). These structures can also help to hide the cable from view. If you don’t have an outdoor outlet nearby, you can run an extension cable from the outlet, along the base of your foundation, and to the location of your camera. Just be sure to position the camera plug and the extension plug in a location that will protect the junction from rain. Do not leave this connection sitting on the ground. Once your camera is mounted and powered on, you’re ready to connect it to WiFi and start using it.
Using the LaView Mobile App
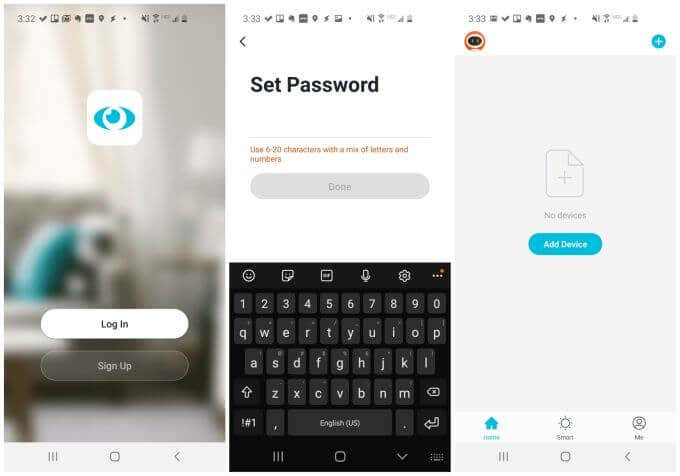
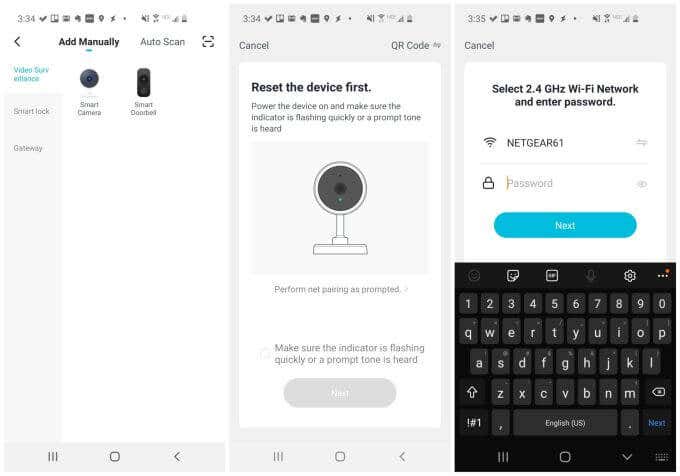
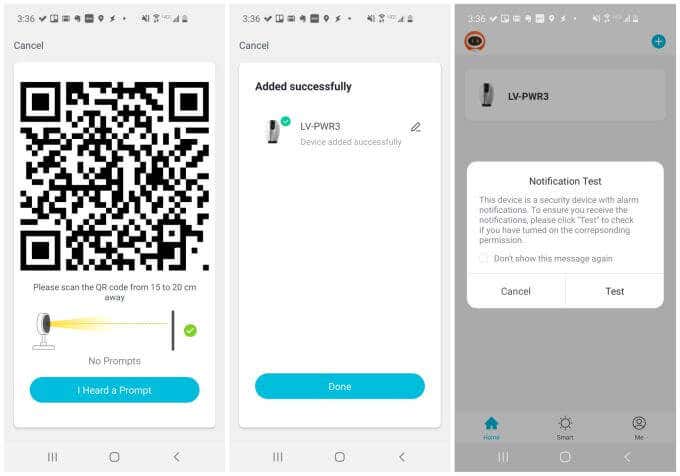
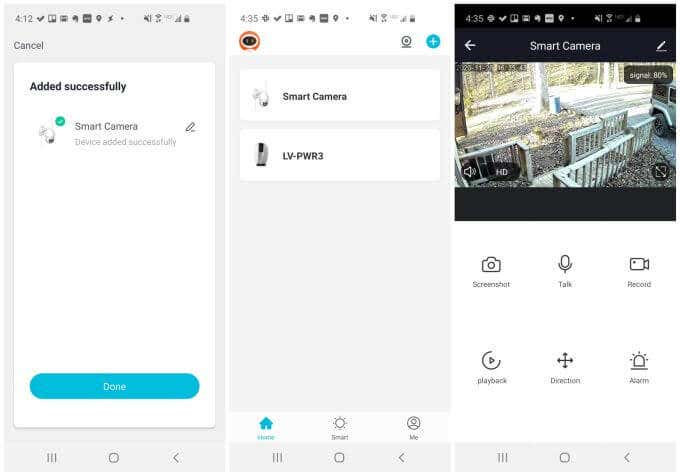
Setting up either the R3 indoor security camera or the R12 outdoor security camera works exactly the same way with the app. You can follow the steps below to set up either or both cameras. To start monitoring and interacting with your cameras, install the LaView app on your mobile device. You can download it for your Android from Google Play, or for your iPhone from the Apple store. When you first open the app, you’ll need to register a new account with LaView. This account is free. You never have to subscribe to any annual or monthly subscription to use the app or to access your devices. Once you’re registered, you’ll see a screen where you can select Add Device to start adding any new LaView security device you’ve purchased. You can browse through categories to find the LaView device you want to add. Once you choose the device, you’ll see a reminder to check if the indicator light or prompt tone is active on the device. If you’ve just bought it and powered it up, this should be active. If you’re using a device that you previously set up, you may need to perform a reset as described in the user’s manual. Once you confirm that your device is ready, select Next and you can choose your home WiFi network. Then, enter the password for the WiFi network. Select Next again. On the next screen, you’ll see a QR code on the entire screen. Just hold your phone screen directly in front of the security camera. The camera will read the QR code and automatically program itself with the required network credentials. The camera will make a tone to let you know auto-programming was successful. Select I Heard a Prompt when you hear this tone. Finally, you’ll see a screen letting you know the device was added successfully to your LaView app. Select Done to finish. When you view your device in the app, you’ll see a Notification Test prompting you to provide the LaView app with the notification permissions it needs to send you push notifications. Select Test to see the instructions on how to do this. Or select the checkbox to stop seeing the nuisance reminder. Repeat the process above for all LaView security cameras you’ve purchased. The process is exactly the same, regardless of the device.
Using the LaView App to Monitor Security Cameras
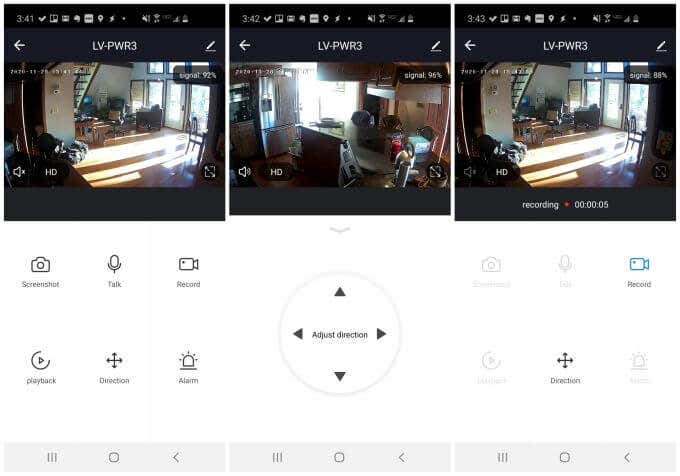
To view your R3 security camera with the LaView app, just tap that camera from the list of connected devices. You’ll see a view from that camera on the top of the screen, and all the controls underneath it. Here are the controls you’ll be able to use on this screen:
Screenshot: Capture a still from the camera view and save it to your phone.Talk: Have a two-way conversation with someone in the room. Tap Talk again to end the conversation.Record: Tap this to start or stop a recording of the live camera feed. This recording will save on your phone.Playback: Playback previously recorded video (only works if you’ve installed an SD card).Direction: Remotely pan the camera in any direction using on-screen controls.Alarm: Configure when you’d like to be notified of any motion or sound activity the camera detects.Album: Review screen captures or videos you’ve saved to your phone.Door Lock: Control any LaView door locks you have installed and connected to your network.Cloud Video: Access screen captures or videos saved to your cloud account (if you’ve purchased the cloud storage service add-on).
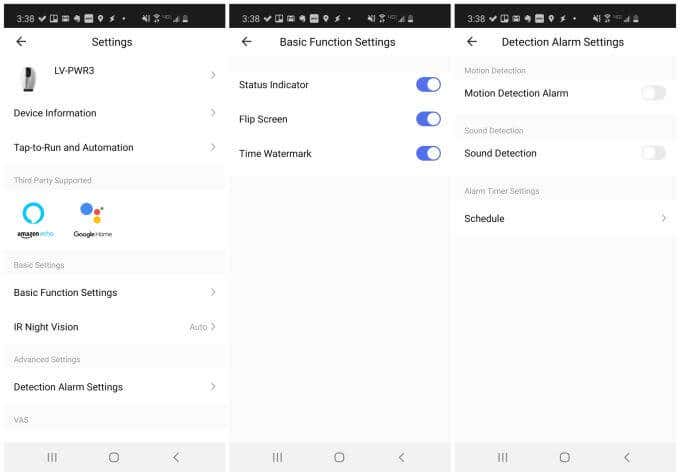
If you tap the Edit icon at the upper right corner of the window, you can access additional camera settings. These include:
Third Party Support: Link your cameras with Alexa or Google Home.Basic Function Settings: Adjust text displayed on your camera view and view orientation.IR Night Vision: Adjust to On, Off, or Auto.Detection Alarm Settings: Enable or disable motion tracking and alarms. You can also set up a schedule here to enable motion alarming only during a certain time of day.Offline Notification: Receive a mobile alert if any of your cameras ever go offline.
Motion detection scheduling is an especially useful feature. Set a start and end time for motion detection and you can make sure there’s no activity in your home when there shouldn’t be. This could be during the day when everyone is at work, or late at night when everyone is in bed and no one should be roaming the house. You’ll notice that connecting to and looking at the R12 wireless security camera feed is completely identical to the R3. You will only need to go to this central app (the LaView app) any time you purchase a new LaView security device.
A Self-Contained Custom Home Security Solution
LaView stands out as a security platform as you don’t need to use any cloud resources or purchase any subscription if you don’t want to. Once added to your LaView app, you can connect to your cameras via your home network and not through any cloud services. This provides extra security and peace of mind as you don’t have to depend on the internet working to connect to your cameras. The R3 is normally priced at $39, and the R12 retails at $50. These cameras are priced far below the average price of similar wireless security cameras — many of which lack some of the features that you get with these LaView cameras. It’s a budget security camera solution that’s perfect for anyone who would like to start distributing home security devices around the home without spending a fortune.
